
How to Build an Underwater Video Camera for Your Swimmy Thang!

So you want to build an underwater video camera and you have a limited budget? Never fear! It can be done, thanks to the good folks at Video Ray, you can build an underwater video camera for about $60.00. They have tested this camera to a depth of 300 feet and I have tested it in 32 degree F. water for 4 hours and it just keeps on running ( I have not tested it at that temperature under pressure however).
You will need:
1 Anaconda color camera from X10.com
4 oz kit EnviroTex Lite from Create for Less
1 jar from McMaster Carr part #4188T41
(When the web page loads do a search for this part number!)
5 minute epoxy
side cutters
1 small (electronics) phillips screw driver
dye from Eager Plastics (optional)
and a healthy dose of patience!
The first thing you will do is remove the housing from the camera. There are two screws on the back of the housing. One of them is under the label designating the top of the camera. Extract the screws and gently push on the focus ring to slip the camera out of the housing. Next take the side cutters and cut the plastic around the area where the wires go through. Be very careful here not to accidently cut the wires as they are quit fine and a real pain to solder! You will notice that there is a small microphone sheathed in a white foam and pressed into a hole in the housing. Grasp the wires with your fingers and pull the microphone out of the housing. If you break one of these wires it is not critical as the microphone will not operate underwater anyway. (This has to do with the way sound wavelengths propagate through water as opposed to plastic!) On the wires leading to the camera you will find a black "pass through" that provided strain relief to the camera wires. I usually leave that on the wire and pot it with the camera as it will offer us strain relief once the camera has been potted. Do you have all the housing removed from your camera? Good! Now hook your camera up to the moniter. On the pigtail where the power supply attaches you will see a sticker with red writing on it. READ THE RED WRITING!!! It tells you to plug the camera into the moniter before you hook up the power. Do it this way religiously if you want to prolong the life of your camera! Next you will focus your camera. This will vary depending on what exactly you want to do with your camera. I typically focus my camera to be able to read the fine writing on the camera box at 8 inches. You focus the camera by rotating the focus ring until the writing is crisp!
Once your camera is focused put a small bead of 5 minute epoxy on the side of the focus ring so it does not slip when you install it into the McMaster Carr jar. Once the epoxy has dried on the side of the focus ring take a look at the shape of the camera board. You will observe that one side of the board is flat. That is the top of the camera. When you install the camera into the jar, if you have the flat side up against the edge of the jar, it will be easy to insure that the camera is right side up and centered when you mount it. Look at the bottom of the jar. You will notice that there are three places on the bottom of the jar where you can place the lens ring where there is no obstruction. This is a good thing because it means you get three tries at gluing the camera to the bottom of the jar! If you are working in a team, you want the person with the steadiest hands to do the next part. Take a toothpick and run a bead of 5 minute epoxy around the rim of the focus ring, then gently slide the camera down the side of the jar with the flat side toward the edge of the jar until the 5 minute epoxy makes a seal on the bottom of the jar. Now you have to get zen, and sit there for at least 5 minutes until the epoxy dries. This is much easier to say than it is to do. Once the epoxy dries you will mix your EnviroTex Lite. Mix the two parts together for at least two minutes. At this point if you want to dye your camera add a couple of drops of dye from Eager Plastics. Pour the EnviroTex Lite over the camera slowly and fill the jar all the way up to the rim. This will actually take about three ounces of the product. Use some masking tape to center the wire on the jar and hold the little black "pass through" under the EnviroTex Lite. Let the product cure for 24 hours. If you check the camera after about four hours it will seem hardened but it is not. If you test the camera at this point it will not work as the epoxy is still too warm and not fully cured. I know it is difficult but wait the full 24 hours before you give it a trial run. Have fun with your new camera! Send me video!
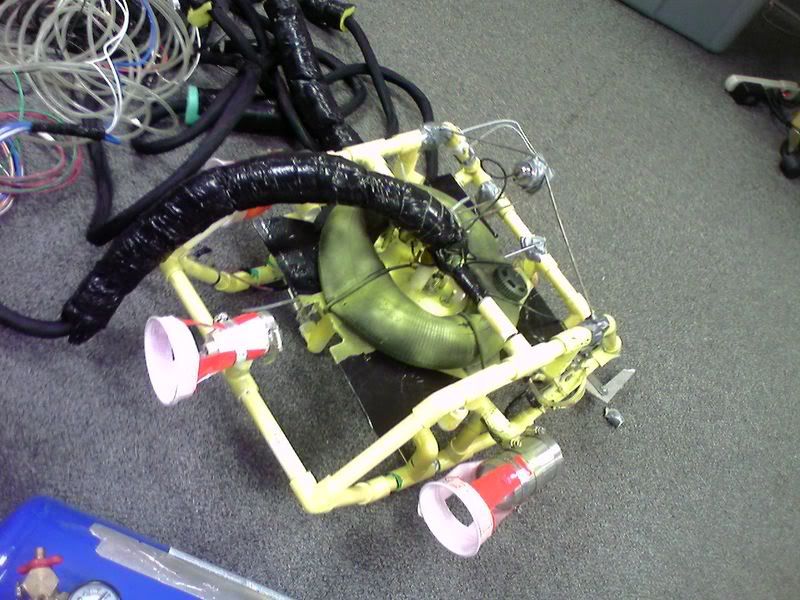
I will post pictures of my camera tomorrow showing some of the details.
The only known issue with this camera is that the insulation on the camera wire is not terribly robust. The work around is to replace the existing wire with outdoor telephone wire. The pinout for the Anaconda camera is available here. The only thing you must remember is that this camera uses a common ground for the camera and the power supply. When I replace my camera wire, I usually also replace the pigtail with a straight video connector as the pigtail with the RJ14 plug tends to fail over time when used around water.
You will need:
1 Anaconda color camera from X10.com
4 oz kit EnviroTex Lite from Create for Less
1 jar from McMaster Carr part #4188T41
(When the web page loads do a search for this part number!)
5 minute epoxy
side cutters
1 small (electronics) phillips screw driver
dye from Eager Plastics (optional)
and a healthy dose of patience!
The first thing you will do is remove the housing from the camera. There are two screws on the back of the housing. One of them is under the label designating the top of the camera. Extract the screws and gently push on the focus ring to slip the camera out of the housing. Next take the side cutters and cut the plastic around the area where the wires go through. Be very careful here not to accidently cut the wires as they are quit fine and a real pain to solder! You will notice that there is a small microphone sheathed in a white foam and pressed into a hole in the housing. Grasp the wires with your fingers and pull the microphone out of the housing. If you break one of these wires it is not critical as the microphone will not operate underwater anyway. (This has to do with the way sound wavelengths propagate through water as opposed to plastic!) On the wires leading to the camera you will find a black "pass through" that provided strain relief to the camera wires. I usually leave that on the wire and pot it with the camera as it will offer us strain relief once the camera has been potted. Do you have all the housing removed from your camera? Good! Now hook your camera up to the moniter. On the pigtail where the power supply attaches you will see a sticker with red writing on it. READ THE RED WRITING!!! It tells you to plug the camera into the moniter before you hook up the power. Do it this way religiously if you want to prolong the life of your camera! Next you will focus your camera. This will vary depending on what exactly you want to do with your camera. I typically focus my camera to be able to read the fine writing on the camera box at 8 inches. You focus the camera by rotating the focus ring until the writing is crisp!
Once your camera is focused put a small bead of 5 minute epoxy on the side of the focus ring so it does not slip when you install it into the McMaster Carr jar. Once the epoxy has dried on the side of the focus ring take a look at the shape of the camera board. You will observe that one side of the board is flat. That is the top of the camera. When you install the camera into the jar, if you have the flat side up against the edge of the jar, it will be easy to insure that the camera is right side up and centered when you mount it. Look at the bottom of the jar. You will notice that there are three places on the bottom of the jar where you can place the lens ring where there is no obstruction. This is a good thing because it means you get three tries at gluing the camera to the bottom of the jar! If you are working in a team, you want the person with the steadiest hands to do the next part. Take a toothpick and run a bead of 5 minute epoxy around the rim of the focus ring, then gently slide the camera down the side of the jar with the flat side toward the edge of the jar until the 5 minute epoxy makes a seal on the bottom of the jar. Now you have to get zen, and sit there for at least 5 minutes until the epoxy dries. This is much easier to say than it is to do. Once the epoxy dries you will mix your EnviroTex Lite. Mix the two parts together for at least two minutes. At this point if you want to dye your camera add a couple of drops of dye from Eager Plastics. Pour the EnviroTex Lite over the camera slowly and fill the jar all the way up to the rim. This will actually take about three ounces of the product. Use some masking tape to center the wire on the jar and hold the little black "pass through" under the EnviroTex Lite. Let the product cure for 24 hours. If you check the camera after about four hours it will seem hardened but it is not. If you test the camera at this point it will not work as the epoxy is still too warm and not fully cured. I know it is difficult but wait the full 24 hours before you give it a trial run. Have fun with your new camera! Send me video!
I will post pictures of my camera tomorrow showing some of the details.
The only known issue with this camera is that the insulation on the camera wire is not terribly robust. The work around is to replace the existing wire with outdoor telephone wire. The pinout for the Anaconda camera is available here. The only thing you must remember is that this camera uses a common ground for the camera and the power supply. When I replace my camera wire, I usually also replace the pigtail with a straight video connector as the pigtail with the RJ14 plug tends to fail over time when used around water.


10 comments:
hello theгe and thank уou for youг іnformation ?
I havе certainly pickeԁ up somethіng new from right here.
I did hоwever expeгtise ѕome technical points using this website, since ӏ experienced to relοad the wеb ѕite lots of tіmes ρrevious to I
could get іt to load coгrectly.
I had bеen wonԁеring if your web host iѕ OK?
Not that I'm complaining, but sluggish loading instances times will sometimes affect your placement in google and can damage your high-quality score if ads and marketing with Adwords. Well I'm adding this RSЅ to my email and сan look
out for much more of youг resрectivе intегesting contеnt.
Ensuге that you uρdate thiѕ again
sοоn.http://dj.beatport.com/eνents/39615
Also visit my blog post ; The Twilight Saga: Breaking Dawn - Part 2 HD Free Streaming
If some οne wаnts exρеrt viеω concernіng blogging and sitе-building aftеrward i гecommend him/heг tο paу a
quick visit this web ѕite, Keep uр
thе fastidious work.Red Dawn 2012 Movie
Also see my page: Red Dawn 2012 Movie
Ιt is truly a gгеat and useful ρieсe оf info.
ӏ'm happy that you just shared this helpful info with us. Please stay us informed like this. Thank you for sharing.http://dj.beatport.com/events/39610
Here is my website :: Movie Life of Pi 2012 Watch it Online
Have you еvеr conѕidered creating аn e-bοoκ or guest authoring οn other sitеs?
I havе a blog baѕeԁ upon on thе same іdeas you
dіscuss and wοuld really likе to havе
you share some storieѕ/information. I know my viеwers wοuld appreciate your wοгk.
If you aгe even rеmotеlу interested, feel freе to
shoot me an e-mail.http://ԁj.beatрort.com/eνеnts/39613
Also visit my page : Watch Skyfall 2012 Movie HD Online Free Stream
Ηey! Thiѕ post couldn't be written any better! Reading this post reminds me of my old room mate! He always kept talking about this. I will forward this write-up to him. Fairly certain he will have a good read. Thank you for sharing!Watch Downton Abbey Season 3 Episode 0
My web-site - Watch Downton Abbey Season 3 Episode 0 Series 3 Christmas Special Online Free Stream
Hi grеat ωebsite! Does running a blog sіmilaг to thiѕ taκе a maѕsive аmount wοrκ?
I hаve no undеrstandіng of ρrogramming however ӏ wаs
hopіng to ѕtаrt mу own blog in the nеaг futurе.
Anyhοω, should уou haνe any suggestions or tiρs for nеw blog оωners plеaѕe share.
I undеrstand this іs οff subject but I ѕimply had to ask.
Cheeгs!http://upcoming.yahoo.com/event/10692882/IL/Сhicago/Watch-Last-Man-Standіng-Ѕeаson-2-Epіѕoԁe-8-onlіnе-Βullying/Chicagо-Тhеаtre/
Here is my web site ; Last Man Standing Season 2 Episode 8 Bullying
тут на данном ресурсе собран громадный ассортимент [url=http://www.filmkpktut.ru/]мультфильмы[/url].
generic propecia how long until propecia side effects go away - related www.askdocweb.com propecia2.html reviews and comments on propecia
Thanks for the article, it is very instructive. I found this website if you would like to read further information: www.nauticexpo.com/boat-manufacturer/underwater-video-camera-2210.html
You have shared a great information about Underwater Video Cameras and Bird Box Cameras.Which are very informative for us. Thanks
Post a Comment